
Want to learn how to ski before you set foot on the slopes? We’ve got you covered.
Skiing is one of the most thrilling, energetic, and euphoric outdoor sports in the world. And going on a ski vacation is something every winter sports lover should do at least once in their lifetime.
But don’t expect to be a powder expert the first time you set foot on the slopes. Regardless of your fitness level, learning how to ski can be challenging — but mastering the unique techniques and landscape navigation of this incredible sport will ensure that you make the most of your alpine adventure.
The one surefire way to ski like a pro is to practice. No amount of reading online will truly prepare you for a day in the snow — although it can be a good way to familiarise yourself with the techniques and knowledge beforehand.
We’ve compiled this complete guide to everything you need to know about how to ski. Now all that’s left to do is get out there and get skiing!
Contents
Firstly, Should You Get Ski Lessons?
100% yes.
While the fun of skiing is almost incomparable, there’s no denying that it’s a dangerous sport.
If you’ve got no experience on the slopes and you decide to take on a trail — particularly if it’s anything other than a green, beginner route — you’re opening yourself up to risk of injury and even death, for both yourself and others around you.
The stakes are high on a ski slope — it’s easy to pick up speed and very easy to lose control if you don’t know what you’re doing. Plus, if you don’t know your way around a resort and the different trail difficulties, you could easily get lost — not something you want to happen in this precarious landscape.
Skiing lessons are always a good idea.
If you live nearby a ski resort or an artificial ski slope, book a few beginner lessons before you leave for your vacation so you can nail down the basics early. And book at least one or two refresher lessons for the first couple of days of your vacation so you can transfer your new found skills to your resort.
This is particularly important if you’ve been practicing on an artificial slope — it’s a different feeling to skiing on actual snow.
Even skiers with years of experience like to have one or two refresher lessons at the start of their holiday so you’ll certainly be in good company if you do decide to do this.
Classes are divided by ability level and age so you can choose which is the best fit for you — and you can choose either group sessions or one-on-one private lessons with an instructor.
As well as actually teaching you the fundamentals of how to ski, a good instructor will also teach you how to get around your ski resort, including how to use a chair lift, which ‘runs’ are the best fit for your ability level, and where to find the best apres ski!
How to Ski: Equipment
The first challenge with skiing is how to handle your gear. This will become second nature after a lesson or two, but may stump you the first time you try.
Most beginner skiers will rent equipment for a ski vacation and lessons. It only really makes financial sense to buy your own gear if you’re planning to ski regularly.
Here are the main things that you’ll need:
- Ski boots
- Skis
- Ski poles
Let’s take them one by one.
Ski Boots
Ski boots can make or break a ski vacation — get the wrong size and you’ll be sporting blisters for days, but get the right ones and you’ll be set all week.
If you’re renting boots, be sure to try on a few pairs so you can choose ones that fit you the best. The sizes will likely differ from normal shoes so ask an assistant to help you.
Ski boots are large and heavy, designed so your feet are both protected and supported all day long.
The ideal fit is pretty snug — you shouldn’t be able to move your foot inside the boot but it shouldn’t feel uncomfortably tight either.
As you’re trying the boots on, check that they feel comfortable in different positions. A good test is to bend your knees into a squat — get the next size up if your toes are pushed up against the front of the boot.
The top of the boot should come up over the top of your ankle and should be a close fit. You can adjust the tightness using the handle on the top of the boot.
Walking in ski boots takes a little getting used to as they’re so heavy and bulky. You can make it work with long strides, walking heel to toe.
Skis
Ask an attendant to choose the correct size ski for you — this will be determined by your height, gender and frame size.
Taller and larger skiers generally require longer skis, while those who are shorter and more petite will do well with shorter ones.
It’s all about finding the right ski for your center gravity. This is why skis for men are slightly different than skis for women — the female center of gravity is typically a little further back than the male so the bindings are usually mounted further forward in order to balance it out.
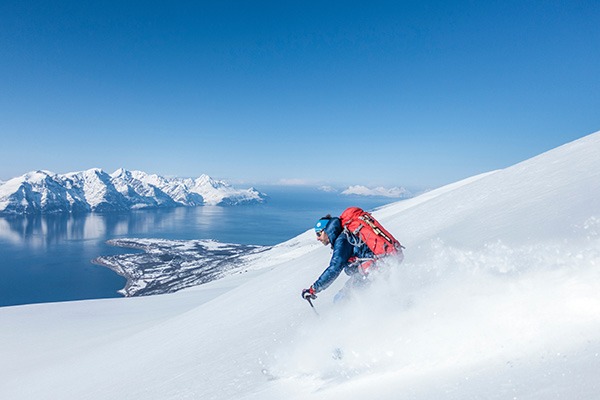
Beginners should simply choose standard all-mountain skis. Once you become more experienced and able, you may want to invest in more specialist ‘fats’ and ‘super fats’ — these wide-waist skis are better equipped to take on powder snow and off piste backcountry runs.
Ski Poles
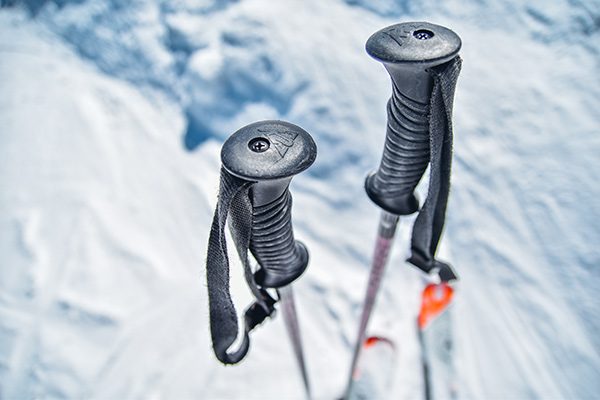
Again, an assistant will be able to help you hire the correct pair of ski poles — and this is again determined by your height.
REI recommend that you choose a pair using the following method:
- Stand in your ski boots
- Turn the poles upside down, grabbing them kist under the basket
- If your elbows are bent at a 90° angle, your poles are a great fit
- If the angle is less than 90°, try shorter poles
- If the angle is more than 90 °, try longer poles
The best poles are strong, flexible and lightweight — but this is less important than fit, and not worth too much time for beginners.
How to Put Your Skis on
The first thing your ski instructor will teach you is how to put your skis on.
First off, you’ll need to separate the skis.
When you hired them, they were likely locked together by the snow brakes in order to make them easier to carry. Find some clear, flat space and hold them vertically. You can separate them by pulling them apart gently with some light shaking to unlock the brakes.
Next, lay them on the ground and make sure that they’re pointing in the same direction away from you. They should be around a foot apart.
Put your left foot in the middle of the skis and your right foot on the right side of the right ski, while placing your poles on either side of the skis for stability. Lift your right foot up and slowly push the toe into the front binding.
Once the toe has locked into place, lower your heel into the rear binding which will automatically lock in with a click.
Do the same with the left foot on the left ski, using your poles for support.
Double check that both boots are locked into the skis by moving them gently back and forth.
How to Take Your Skis off
Also important is learning how to take your skis off.
You’ll notice that there’s a lever on the rear binding just behind your ankle. You can push this down with a pole, which will unlock the brake and release the back of your foot. You can then pull your toe out.
How to Ski: The Basics
As we’ve mentioned, the best place to learn to ski is in a ski lesson, on the slopes — but you can certainly get a good idea of what the lessons will look like beforehand by reading up in our online guide.
Walking in Skis
The first thing you’ll learn in your ski lessons is how to get around in your skis without actually skiing.
Walking in skis can be tricky — they’re so long and thin that you won’t be able to simply stroll around like normal.
There are three different ways to walk in skis:
- Side-stepping: This is the easiest way to get up small hills while you’re wearing skis. Simply stand perpendicular to the slope and take small sideways steps, one foot after the other, gradually moving yourself and your skis back to the summit. You’ll use this technique a lot when you start out on ‘bunny’ slopes.
- Herringbone: This is another way to move up hills and along flat slopes. Position your feet and skis in a V-shape so the tips are moving away from each other. Gradually move each ski a little forward, one after the other. You can propel yourself forward easier and faster by bending your knees in a high squat and using your quadriceps muscles.
- Skating: This is the fastest way to walk in skis although may take a little practice to truly master. You’ll need to recreate the herringbone ‘v’ shape we detailed above, but this time moving your weight to the edge of the skis, allowing them to glide forward and out as if you were ice skating, propelled by your forward momentum. It will look a little like this:
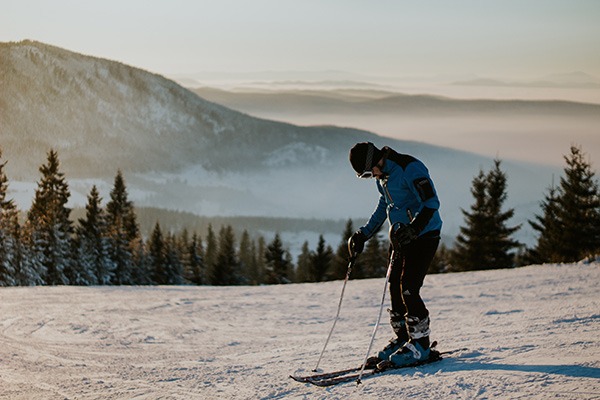
Adjust your Body Position
If you’ve ever skiing on TV, you’ll notice that there’s a very specific position assumed for downhill skiing.
Essentially, you’ll be in a squat position with a slight forward tilt. Although you may feel a little uneasy at first, don’t worry about losing your balance — the length and shape of the skis are designed to subtly adjust your center of gravity so you’ll be in the perfect position to stay upright while moving downhill at speed.
Bend your knees and lean forward to the point where your shins are resting against the front of your ski boots. You should also be holding your poles with your elbows at a 90° angle so they’ll be pointing diagonally behind you.
At some point you’ll automatically be able to discern where your center of gravity should be on the skis. Too far back and you won’t be able to turn; too far forward and you’ll lose control of your skis. Both will probably result in a fall.
Just remember to keep your knees a little bent and hands slightly in front of you.
Manipulate your Movement
Even while you’re barely moving you’ll be able to adjust your direction.
Move into the herringbone ‘v’ position if you feel yourself moving backwards. This will slow your backwards momentum — hence why it’s a great position to use to move uphill.
If you feel yourself sliding forwards, move your skis into the opposite position — with the tips together and ends apart. This is called a wedge or a ‘snowplow’.
Stop with a Snowplow
The snowplow position — also known as the wedge or the pizza — is what you’ll need to do when you need to come to a stop while you’re skiing downhill.
Essentially, you’ll need to force the back of the skis outwards using the power of your leg muscles. It is much easier to do this than to force the tips of the skis inwards.
The further apart you can drive the backs of the skis, the slower and more decisively you’ll be able to come to a spot.
When in doubt, spread!
Avoid allowing the tips of your skis to overlap at the front while you force the ends out. This will lead to a loss of control and a potential fall.
If in Doubt, Pizza
Using the wedge/snowplow/pizza position is the best way to start off skiing down a slope.
This position stops you moving with too much momentum, so you’ll be cruising at a low speed with plenty of control for turns (next lesson!) and avoiding obstacles.
As you get more experienced and confident with your skiing, you’ll be able to move away from the wedge technique and move on to parallel skiing. You’ll go faster and will have less control, but can slow yourself down by using carving turns.
Next Lesson: Turning
One of the most important things you’ll be learning in your ski lessons — probably in the second or third lessons — is how to turn while moving downhill in your skis.
This is another callback to the snowplow technique, so make sure you’ve got that mastered first before you move on.
One of the essentials of skiing is that you will move in the direction that your skis and pointing in. So it follows that to turn in a different direction, you need to move your skis in that direction.
Easy peasy, right?
Well, it might take you a few tries to really perfect the art of maneuvering your skis. But remember, practice makes perfect!
To Parallel Turn
For sharp turns — for instance when you’re maneuvering around an obstacle, you’ll have to use a semi snowplow technique.
If you want to turn to your left, move the back of your right ski out in a half-snowplow. This will naturally move the skis so they point to the left, moving you to the left as well. Make sure you really spread that right ski out so you’re moving slowly enough to make a really tight turn.
If you want to turn to your right, do the same thing with the left ski.
To Carve
Another type of turn is called carving. This isn’t quite as sharp or slow as the parallel turn, but is used more for longer, smoother turns during alpine skiing.
It’s more subtle than the parallel turn, but draws on the same technique.
To carve to the left, tilt your right ski so the inside edge cuts through the snow and the outside edge is in the air. The pressure of the snow plus your forward momentum will result in a smooth turn to the left.
To carve to the right, do the same with your left ski.
Parallel Skiing
Once you’ve mastered the pizza technique and feel confident with your turns, you’ll be able to graduate up to parallel skiing.
This is the technique that will allow you to move faster down the slopes and really help you become a better skier.
Essentially, you’ll need to move your skis into a parallel position — instead of the wedge ‘v’ shape — and slow yourself down with carving turns.
Instead of using a snowplow to gradually bring yourself to a halt, you can try to do a parallel stop. Basically, turn the skis quickly to the right or to the left while exerting enough force against the snow (by pushing against your uphill ski) that you come to an immediate halt.
Falling Over: It’s Going to Happen
Falling down while skiing is a natural part of learning how to ski — and will continue to happen even as you become more experienced.
In order to minimize injury to you and risk to others, you’ll need to learn how to best control your falls.
The secret is to fall behind you, uphill. This will insure a lesser impact on your body and will keep you out of the way of your skis. Try to keep your arms away from the impact as they are more fragile and likely to break if you fall directly on them.
If there’s an obstacle in front of you that you can’t easily turn around from — whether that’s a natural obstacle like a tree, or another skier — you should cause yourself to fall uphill. Swerving chaotically is risky — it will likely lead to you losing control of your skis and possibly even colliding with something or someone else.
Fall responsibly!
When to Try an Intermediate Trail
Most of your ski lessons will take place on bunny hills and green circle slopes, but at some point you’ll be feeling confident enough to really get out there.
At this point, take a look at green circle and blue square trails that you might be able to tackle away from your instructor.
Choose trails that start at the beginning of a chairlift and aren’t too far away from the base area. Remember to ask your instructor and experienced friends for their advice before trying out the trail.
Don’t get too discouraged if you find yourself falling over. All it takes is practice to become a great skier.
Stick with the intermediate trails until you have truly mastered all the skills necessary to be a competent skier and heed all ability warnings — particularly when it comes to black diamond and double black diamond slopes.
How to Ski Video
If you’re more of a visual learner, take a look at this awesome video of how to ski.
How to Ski: Rules
Learning how to ski isn’t just about learning how to move downhill on skis.
It’s also about how to make the most out of a resort and be able to navigate it safely.
Here’s a few things you need to know before your ski holiday.
Ski Trail Ratings
When you first arrive at your ski resort, you’ll likely be given a map detailing the different trails — or ‘runs’ — that you can find there.
These are graded according to difficulty — although you should note that there’s no universal standard for trail ratings, so the difficulty is more a comparison of the different trails in that particular resort.
A blue trail in one resort may be much harder than a blue trail in another, for example.
The number one rule when skiing is not to be cocky. Don’t choose trails that are outside of your ability or experience level — you’ll only be putting yourself and others around you in danger.
Skiing is a dangerous sport — remember to respect the slopes. Choose trails where you know you’ll be able to stay in control all the way down.
It’s also worth noting that ratings are slightly different in the US and Canada than they are in Europe. We’ll cover both systems so you’ll know what you’re facing wherever you’re going.
US and Canada
There are four types of trail difficulty in North America:
| Type | Green Circle | Blue Square | Black Diamond | Double Black Diamond |
|---|---|---|---|---|
| Image |  |  |  |  |
| Difficulty Level | Easy | Intermediate | Advanced | Expert |
| Slope Grade | 6-25% | 25-40% | 40% + | 40% +, obstacles, narrow |
Learning slopes are known as ‘bunny’ slopes. They’re not usually marked but are usually found in locations with a wide surface, slight incline and lots of flat space for beginner practice.
Europe
Thanks to the wide number of ski resorts across a number of European countries, there are a number of different trail ratings to be aware of:
| Type | Difficulty | Countries Used | US Equivalent |
|---|---|---|---|
| Green | Beginner | Spain, France, Scandinavia | Bunny |
| Blue | Easy | Europe-wide | Green Circle |
| Red | Intermediate | Europe-wide | Blue Square |
| Black | Advanced/Expert | Europe-wide | Black Diamond/ Double Black Diamond |
| Double/Triple Black | Expert only | Scandinavia | Double Black Diamond |
| Orange | Expert Only | Austria, Switzerland | Double Black Diamond |
| Yellow/Red Diamond | Expert - 'off-piste in marked area' | Europe wide | Off-Piste |
Right of Way
One of the first things you’ll learn in your ski lessons is about right of way on the slopes.
No matter how experienced you are or how fast you’re going, the right of way is always awarded to the person further downhill from you.
If you’re behind, it’s your responsibility to avoid them and keep your distance — you don’t want to barrel into them if they fall over or slow down.
As we discussed earlier, remember that if you are worried you’re going to collide with another skier, make sure to fall uphill instead of hitting them.
As well as being aware of the person in front of you, remember that there will be skiers and snowboarders behind you as well. While it’s their responsibility to avoid you, you should take pains to make sure that you don’t put yourself at unnecessary risk of collision.
If you need to stop while skiing downhill, make sure that you’re not in the way of people coming down behind you — don’t just stop dead in your tracks. This goes double if there are mounds or hills that behind you that mean you can’t be seen from above.
Try to move to the side of the slope if you stop, or otherwise simply move down until you can be seen by people coming down behind you.
How to Use a Chairlift
Another important thing to learn when you start skiing is how to use a chairlift.
A chairlift is the device that takes you from the resort to the top of the trail you want to ski down. They are fantastic inventions, but can be dangerous if not used correctly.
Perhaps the most important rule of using a chairlift at a ski resort is not to lean out of the chair or jump off it at any point. Even if you drop something (even a ski!), stay on the lift until you reach the top. You can salvage anything dropped later with the help of a worker.
Here’s a step-by-step guide on using a chairlift:
- With your skis already on, walk up to the chairlift and wait in line
- Hold your poles under your arm or in one hand — make sure that the straps are off your wrist
- When the operator gives the OK, walk into the designated loading area and wait for the next chair
- When you see it coming over your shoulder, grab the side and sit down as it passes under you
- Once your chair reaches the top, make sure your skis are pointed forwarded and push away on to the slope, using the momentum of your chair to move you forward
- Missed the top? Wait for the trip switch that will stop the chair. The operator will be along shortly to help you off.
Here’s a good video that shows you the process:
For the smaller slopes, including some of the bunny slopes and even some green circle trails, there won’t be a chairlift but instead a rope tow.
These are very easy to use — you essentially hold onto a free handle on the tow and allow yourself to be pulled up the slopes. Make sure to herringbone or skate-ski at the top of the lift.
Many bunny slopes will have an even easier version to use — a carpet lift. This conveyor belt-style contraption requires you to simply stand on the lift until you reach the top of the slope.
Now you know everything there is to know about how to ski — all that’s left to do is to get out there and start your lessons!


