
Want to learn how to snowboard? We’ve got you covered…
Snowboarding is fun. With a capital F. Fun, fun, fun.
There’s almost nothing like it — you’ve got all the freedom and exhilaration of skiing with the extra knife edge of tricks and jibbing.
Don’t worry — we’ll fill you in on jibbing soon.
But as with all winter sports, snowboarding is not risk free — in fact, it holds the dubious honor of having twice the injury rate of plain old alpine skiing.
You can’t just jump on a snowboard and hope for the best. This sport requires lessons and plenty of practice before you can really start exploring what it means to travel by snowboard.
But it doesn’t hurt to be filled in before you start your lessons. That’s why we’ve compiled this complete beginner’s guide to how to snowboard, as well as tips on how to set up your snowboard bindings and how to size your snowboard.
All that’s left to do after you’ve read this is to start your lessons.
Let’s take it away…
Contents
Snowboarding Gear
Before you start your lessons, you’ll want to have a few items at your disposal so you can dive straight in.
The bigger items — like the snowboard itself, for instance — you’ll probably want to hire (at least until you feel committed enough to the sport to splash the cash on your own board) but the smaller items are worth buying out right.
Here’s what you need.
Snowboard
This is obviously your main piece of kit and — if you’ve decided to buy instead of hire — will be the largest expense.
We’ll get into the different types of snowboard and how to size a snowboard shortly.
Snowboarding Boots
Just like with skiing, you’ll need a specialist pair of boots for snowboarding.
These are designed to support the foot and ankle, and to easily strap into the bindings on your board. These are also available to hire — just make sure that they fit properly.
Like ski boots, they should find a happy medium between tight and comfortable. Your feet should be immobile within them, but they shouldn’t be so tight that they’re cutting off circulation.
The shop assistant will be able to help you find the correct size so make sure that you ask for help if you’re not sure.
Unlike with skis, snowboard bindings will not automatically unlock your boots from the board if you fall over. While this can be a little uncomfortable — we’ve all felt like we’ve been tangled up in our boards before — you’re much more likely to avoid bad knee injuries this way.
Crash Helmet
Crash helmets are an absolute must-have item when you’re snowboarding.
We’ve already mentioned the high injury rate compared to already-pretty-dangerous skiing, and head injuries can be a real possibility in this sport — particularly if you’re performing tricks and turns.
Your helmet should be snug without being tight. It shouldn’t be so large that it’s moving about on your head or falling down over your eyes, but it shouldn’t be too tight either. You’ll be wearing it for a large portion of the day so you don’t want to be uncomfortable.
Again, this is something that your shop assistant will be able to help you size accurately if you’re not sure what you’re looking for.
Other Snowboarding Gear
And then we have all the small stuff that you need for snowboarding.
- Leash — this helps you keep a hold of your board if/when you fall off it
- Goggles — to reduce glare on the slopes and improve your vision
- Gloves — to keep your hands warm and mobile in the cold weather
- Stomp Pad — this is a specialist type of grip surface that you can place behind the back foot binding on your board. It’s a great tool for beginners who aren’t quite ready to bind both feet yet.
Snowboarding Styles
Before we get into how to choose the correct snowboard for you, we should first fill you in on the different types of snowboarding.
That’s right — it’s not all halfpipes!
The type of snowboarding that you plan to participate in the most will dictate the type of board you get, so it’s good to know this background before you buy.
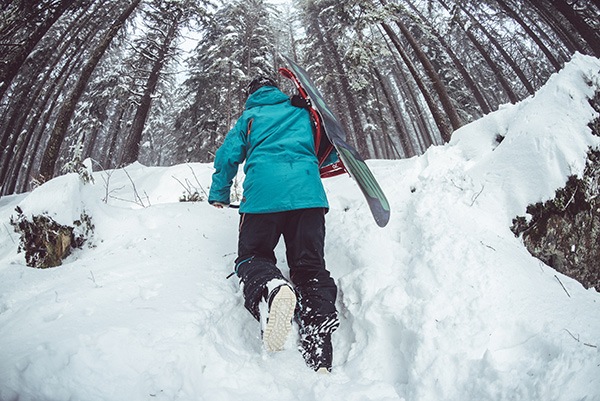
Freeriding Snowboarding
Also known as off-piste or backcountry snowboarding, freeriding is exactly what it sounds like — boarding on ungroomed terrain.
Off the piste, you’ll be riding in powder and so will require a board that allows you to float.
There are still plenty of tricks with freeriding — but you’ll perform these spontaneously off the natural curves and obstacles of the backcountry terrain. No manmade obstacles here!
Jibbing
Jibbing is almost the opposite of freeriding and refers to performing snowboarding tricks on surfaces other than snow.
Manmade obstacles like rails, pipes, benches are the canvas for jibbing, and you’ll be in a snow park instead of on the slopes.
Take a look at some jibbing in action here:
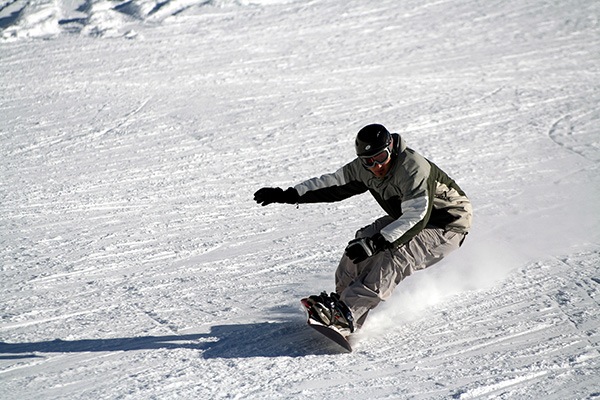
Alpine Snowboarding
For many of us, alpine boarding is the entry point into snowboarding from skiing.
They’re very similar disciples — essentially, you’ll be boarding downhill on hardpack and groomed runs with minimal tricks and jumps.
As opposed to freeriding, your board will be long, thin and stiff to allow for maximum carving and speed.
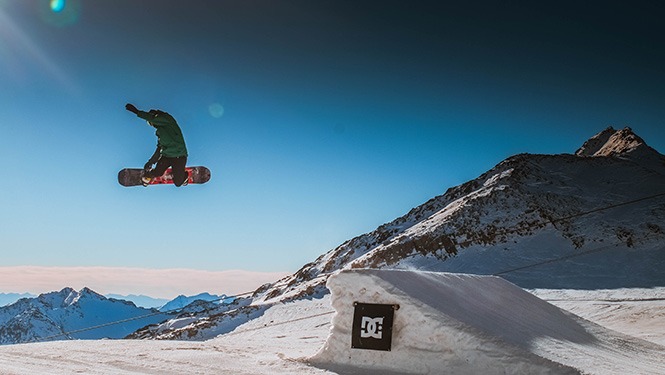
Freestyle
Freestyle snowboarding is a little less defined — essentially, it’s any type of snowboarding that includes tricks, both manmade and natural.
It’s a term that encompasses a lot of different boarding styles and you’re likely to hear a lot about it on the slopes and in the snow park.
A lot of snowboarders like to perform technical tricks while freestyling so boards are flexible, short and forgiving. For this reason, they’re pretty popular with snowboarding beginners too!
Slope Style
Slope Style is a particular type of snowboarding contest that’s super popular in the community.
It combines both alpine boarding and jibbing, seeing the competitors perform tricks while moving downhill at speed.
Boardercross
This is the snowboarding version of motocross. And like motocross, it’s pretty risky.
5 or so competitors race down a course that’s beset with obstacles. The first one to finish is the winner.
Snowboard Racing
A ‘cleaner’ type of snowboard race which sees competitors race downhill.
There are no obstacles in snowboard racing — just gates, around which they must turn.
These sharp turns require plenty of core strength as the racers have to tilt a long way to the ground to perform them successfully at high speeds.
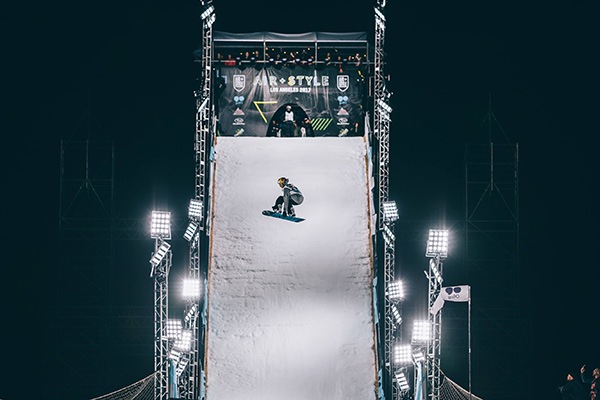
Big Air
Big Air tricks are watched by snowboarding fans from all over the world, so spectacular are their feats. You’ve probably seen some of these Red Bull sponsored events on the TV too.
A Big Air event sees a snowboarder career downhill at high speeds before launching themselves off a large man-made jump, performing tricks in mid air before they land.
Crash helmets are mandatory.
Here we go…
Halfpipe
Just like the ever-popular halfpipe in skateboarding culture, snowboarding halfpipes are a much-loved event in the snow park too.
Types of Snowboard
Despite there being a wide variety of different snowboarding styles, there actually aren’t that many different boards on offer.
Unless you’re a specialist or only interested in one type of boarding, we always recommend going for something versatile like an all mountain snowboard.
Beginners may want to look at freestyle boards as well — the fact that they’re a little shorter means that they’re easier to control.
All Mountain Snowboards
As suggested by the name, all mountain snowboards can be used — you guessed it — all over the mountain.
These are versatile boards that can handle most boarding adequately — and exceptionally so if you do your research and invest in the best snowboard.
Whether you’re planning on carving down a groomer, jibbing in the snow park, turning, sliding, whatever — an all mountain board is your friend.
Freestyle Snowboards
Freestyle boards are more technical than your run-of-the-mill all mountain ones and not designed for alpine snowboarding or carving.
They’re great for tricks, however.
The shape is shorter and wider than normal snowboards, which allows the boarder plenty of control — very useful for when you need to make precise movements during a trick.
Plus, these boards are super flexible and forgiving, made for precision rather than for speed.
Many experts actually recommend freestyle snowboards for complete beginners to the sport, and we agree. The extra layer of control will give you plenty of confidence during your lessons.
Alpine Snowboards
Also known as carving snowboards, these bad boys are shaped to perform beautifully downhill.
They’re basically the opposite of freestyle boards — long, thin and stiff, designed for speed and sweet carving.
As you might expect, these are definitely not for beginners. You’ll need plenty of experience behind you to be able to cope with the lower level of control on offer.
Freeriding Snowboards
Different again, freeriding snowboards are specifically designed to be used on ungroomed terrain, in powder.
Long, with a wide nose and a short tail behind the back binding, they’re ideal for floating in powder.
Unlike freestyle and all mountain boards, freeriding ones don’t have much versatility — they are much harder to control on groomed runs or in the snow park. Beginners, we’d leave this one on the shelves for now.
How Tall Should My Snowboard Be?
Once you’ve decided what type of snowboard is best for you, you’ll need to size it.
The first time you hire a snowboard, the shop assistant will be able to advise you on the best size for your individual preferences and stature.
Once you decide you want to buy your own, we’d recommend simply noting down the size that you usually use on the slopes and buying one online (that’s where you’ll find all the best deals!)
Learning how to size a snowboard isn’t a big deal. Essentially, you’ll need to stand the board on its tail and measure where it comes up to on your body — you’re aiming for somewhere between your chin and your nose.
As a rule of thumb, the shorter the board, the easier it is to control. Choose longer boards for higher speeds and less control. Beginners — go short at first!
Also important is the width of the board.
With your snowboarding boots on, stand on the board where the bindings will go. Ideally, there’ll be some room on the tops and bottoms of your feet so they don’t spill over the side.
There are specialist wide boards for people with particularly large feet (over US11) so feel free to take a look at these if you fall into that category.
When you’re on your board, you should be able to tilt it around 55° either way before your toes or heels hit the ground. This will help you with turning and carving.
Most snowboards are also advertised with a weight range — make sure that you fit into that weight range as the boards are designed to manipulate your center of gravity. Heavier boarders may need a bigger board.
How to Set Up Snowboard Bindings
The last thing you need to do before you get started snowboarding is to set up your bindings.
Firstly, establish which is your lead foot. Left or right? This won’t necessarily correspond to whether you’re left or right handed.
We’ve found that the easiest way to correctly determine this is to ask a trusted friend to give you a little shove from behind. The foot that you naturally stick out as a reflex to steady yourself is your lead foot.
Those that ride left foot forward are known as regular. For the right-footers out there — you’re goofy.
Once you know your lead foot, it’s time to get the bindings sorted.
There are two types of snowboard bindings:
- Strap — you place your boot in a secure base and then attach a set of straps around the boot, locking them into the base
- Speed Entry — a little more flash, speed entry bindings sees a hinge attached to the base which you simply slide the boot into
Strap bindings are the most common (and cheap) but speed entry are popular among experienced snowboarders too.
Regardless of the type of binding you’re using, the process is the same.
Fasten your lead foot into the front binding and do the same for your back foot. Take a little time to see how you feel on the board.
Do you feel stable? Or like you might fall at the touch of a feather?
If the latter, the bindings may be set up a little far apart on the board. Generally, we’re aiming for around shoulder width apart.
The angle at which you set up your bindings matters too.
If you’re spending your time jibbing in the snow park, the bindings should be symmetrical.
How to Snowboard
OK, finally… it’s time to actually start snowboarding.
First things first, you’ll want to strap your foot in — just the front one for now as you travel to the boarding area.
Walking and Sliding
Before you start boarding, you’ll need to learn how to walk with just your lead foot in the binding.
This will definitely feel awkward the first few times you try it — keep practicing though and it’ll become second nature. It’s definitely worth mastering as this is how you’ll load and unload from the lifts.
Essentially, you’ll need to slide with the board on the toe edge while simultaneously stepping forward with your free foot.
It’s a little more difficult and slow going uphill. Face up the hill with your free foot pointing in front of you, but move the board so it’s horizontal across from you. While stepping forward with your free foot, put pressure on the toe edge of the board and lift it up forward.
Skating
The next thing you’ll learn is how to skate on your board.
Make sure that you’ve got this down on a flat surface before you try a downhill run.
Skating on your snowboard is a little like skateboarding. With your front foot locked into the binding, push the free foot to get some momentum behind you, then place the free font behind the back binding.
If your board has a stomp pad, you’ll be able to rest it against that for a little grip.
Practice skating on the flat board, as well as pushing down on first the toe edge and then the heel edge. This should give you a feel for how it will feel moving around on the snowboard proper.
Posture
Before you start snowboarding, another thing to have a handle on is your stance.
Stand still on your board with both feet in the bindings — they should be around shoulder width apart. You want to put a little bend in your knees and adopt a relaxed posture. You’ll alter your stance as you ride to put pressure on different parts of the board and change the direction you’re traveling.
Your head should be facing in the direction of travel with your eyes looking forward at where you’re going — not fixed on the ground!
At first, you may wish to stretch your arms out parallel to the ground as if you were surfing — this will help aid in keeping your balance.
Once you’ve got used to snowboarding, you’ll be able to let your arms hang naturally at your sides or place your hands together on your front knee if you so desire.
Learn How to Get Up
One thing that you’ll be doing a lot of during your snowboarding lessons is falling over.
That’s absolutely fine — and part of the fun — but you want to make sure that you can get up again quickly and easily.
Unlike skis, your snowboard bindings will not automatically release your boots when you fall over. It stays attached, which mean a little extra effort standing upright again.
You may need a little core strength to do it gracefully — but don’t worry, you’ll definitely build that strength as you pick yourself up multiple times during the day!
It’s best to practice first on a flat surface so you can be prepared.
Strap both feet into the bindings and sit on the ground with your feet out in front of you.
Using your hand, push yourself up off the floor while simultaneously digging the heel side of the board into the snow.
It’s a little easier getting up on the toe side of the board. Starting in the same position, you’ll need to move your body onto your hands and knees, and then push the toe side of the board into the snow while you push up with your hands.
Falling Leaf
Now you’re ready to start snowboarding.
At this point, your instructor will probably take you to a lift where you’ll need to use the snowboard walking technique we talked about earlier to get on and off.
It’s time to learn the ‘falling leaf’ technique — much easier and safer than careering down the hill at top speed!
Some people call this garlanding.
At the top of the hill, strap your back foot into the binding and stand upright.
Putting your weight on your lead foot, feel yourself start to move forward. Make sure that your head and eyes are pointing in the direction that you want to travel. You can also point your front arm in that direction too if you want to keep your balance.
Practice moving forward on the flat board like this, as well as on the toe and heel sides. You’ll find that your direction alters depending on which side you’re pushing on.
To move your weight to the toe side, push forward with your toes angling towards the ground. For the heel side, angle your weight backwards with your heels pushing towards the ground.
Then gradually angle yourself back to the flat board, pulling your weight back to center.
Keep practicing this until you feel comfortable at all of these angles and can move gracefully.
Time to Turn
Once you’ve got the falling leaf down, it’s time to start making turns.
Turns can be difficult on a snowboard and tend to be where beginners fall the most and get the most injuries — make sure you’re not turning recklessly and have all your safety gear fitted well.
Most often called J-turns, you’ll start by attempting turns on the toe and heel sides.
In falling leaf with your body facing down hill and front arm outstretched before you, slide forward before pressing your body to either toe or heel side. This will cause your board to make a long arch in the snow.
To complete the ‘J’ shape we’re aiming for, position your knee towards your body if you’re doing a toe side turn or away from your body if you’re on the heel side. This will bring you to a gradual stop.
Once you’ve mastered these separately, it’s time to link the turns as you travel down the hill.
First a toe side turn, then a heel side one, and so on, and so on, with a few seconds of flat riding between each one to keep your momentum up.
Deliberate movement is the key here — you’re not just turning the board but repositioning your body and your center of gravity each time. Make sure that your head and eyes are always looking in the direction you want to go in. They set the tone for the turn.
Here’s a good video on turning if you’re more of a visual learner:
How to Stop on a Snowboard
Once you’ve mastered turns, learning how to stop on a snowboard is pretty easy.
But we bet you still fall over a ton while you’re practicing! 😅
As you slide downhill, you need to push your heels hard into the ground and move your center of gravity backwards, which will bring you to a gradual stop.
Remember, you need to push backwards — not tilt the toes and front of the foot upwards, that’s only going to make you tip over.
Once you’ve got the hang of that, you’ll want to try the uphill stop technique.
For this, you need to make sure that there’s no one traveling directly behind you — if there is, a collision is inevitable and you definitely want to avoid that at all costs.
As you travel down hill this time, push your toes into the ground instead, marginally lifting your heels at the same time. This will bring you to a stop and reposition you so you’re facing uphill.
Again, this takes a little time to get used to and you’re probably going to fall over a bunch of times before you master it.
Our number one tip is not necessarily to shift your center of gravity forward but rather to reposition your feet as if you were simply going on to your tip toes. If you push your body too far forward, you’re simply going to faceplant into the ground. Ouch!
How to Fall
It’s almost inevitable that you’re going to fall when you’re snowboarding — especially if you’re a beginner learning a bunch of new skills all at once.
Not only is it part of the fun, but it’s a rite of passage.
You’ve gotta earn that après ski beer after all!
But falling is definitely where most injuries happen, so it’s best to be prepared to fall well to avoid any broken bones.
Breaking wrists is one of the most common snowboarding injuries — usually because people fall onto their hands as they go down.
To avoid this, we’d recommend either crossing your arms over your body or stretching your arms out wide as you fall, dissipating the pressure on small, fragile bones.
Now you know everything you need about how to snowboard!
Time to take those lessons 🏂


